Being a fan of documenting projects and other things, I thought I would share the process of a current personal project I started on Friday. I rarely create stained glass pieces for myself since I started selling at a makers market every Saturday, but I’m finding that having something to work on just for me helps prevent burnout.
Last month on June 13th I started a personal project for myself that I finished on July 24th, a little over a month from start to finish. I took my sweet time and enjoyed (almost) every minute of it. Usually I use my Cricut to cut out my patterns since I have shaky hands and even tracing can be tricky on some days, but this was a mailed paper pattern so no Cricut this time. I decided to use my light box and trace the pattern directly onto the glass which made my lines even more chaotic but I was committed… So many pieces had to be adjusted over and over again. I swear glass shifts when you breathe on them so I resorted to taping the freshly ground pieces down as I went and it worked out perfectly! In the end, when I finished that project I felt a huge sense of accomplishment, more so than usual. It was not an easy pattern to do and it gave me a rush of pride when I looked at the work I did.
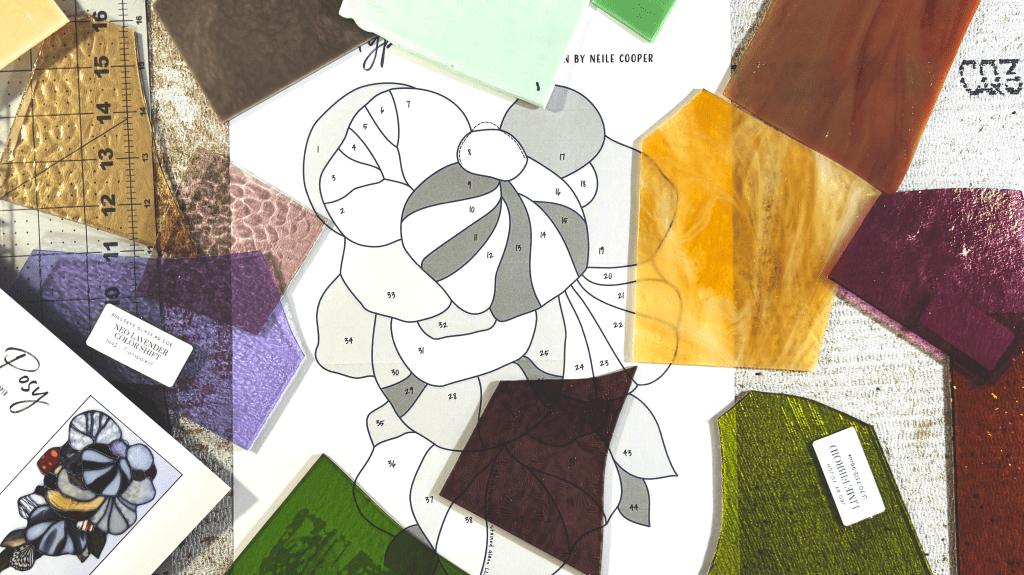
Ok, now on to this current project! I’m working with the Polypore Posy pattern by Neile Cooper. This is a pattern that I bought when I first got into stained glass, I ordered it the same time I ordered all of my supplies. My goal was to start it when I felt confident enough in my solder work because it felt like a huge challenge. I’ve had confidence with my solder work for quite a while now but haven’t had time to start this project until I decided to make time!
I hope you enjoy these progress posts, I’ll be sharing updates as I inch along… which will probably be once a week or so.
| Glass Selecting
My idea for this piece is to go the “scrappy route” but I want to include some of my favorite glass pieces and scraps. I wasn’t planning on doing a specific color palette but an autumnal palette sort of came through on its own and I’m going with it!

There are some glass pieces I want to use in this project such as a piece of lime fibroid glass by Youghiogheny and scrap pieces of Bullseye mottle and streaky neo-lavender. The overall project will have lots of ambers, creams and 70’s sofa hues. I’m loving the direction this palette is taking already!
| Template Prep + Pattern Cutting
Since I won’t be using my Cricut, I needed to prep my template and cut the pattern out. Some artists prefer using pattern shears to cut away the line on a pattern but I just use scissors and an exacto knife.
I decided to work on one section at a time rather than cut the whole project out, grind it all at once and so forth. I also want to pick glass as I go, so doing this project this way feels good. I’m embracing a slow and steady pace, there’s no rush or deadline since it’s for me.


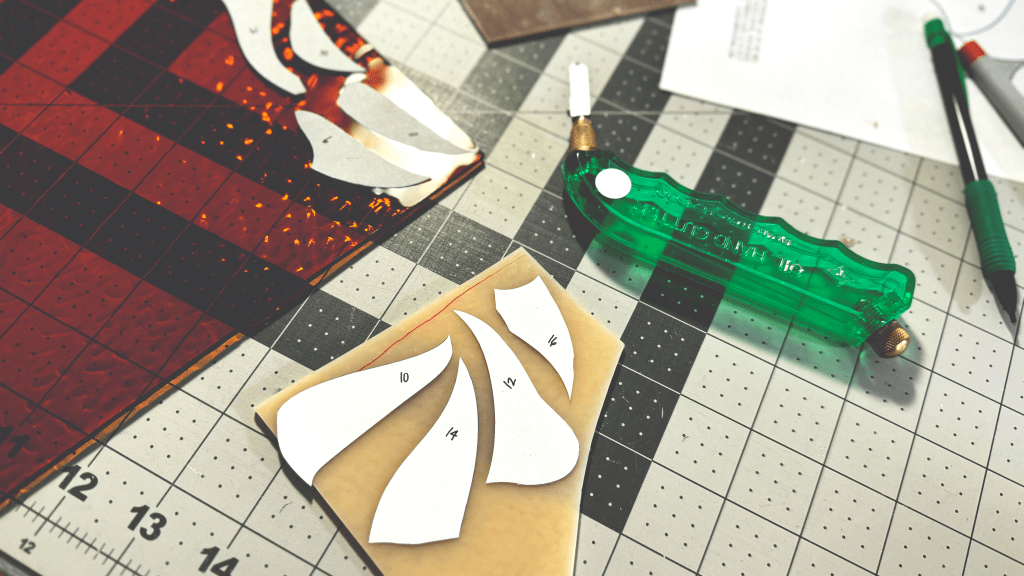
I first prepped my template. This pattern came with two copies, one for cutting and the other to use as a template. Typically I keep all of my pattern templates in page protectors so that when I’m grinding and checking my pieces against the template the paper doesn’t get destroyed from water and glass mud. When a pattern is too big for a pager protector I do something a little different, I cover the template with packing tape! This keeps the water off the paper and I can wipe it clean when done.
Once my template was ready, it was time to start cutting out the first section of the pattern – I’m starting at the top and working my way down. I traced each piece onto the glass and cut the pieces out one by one with my Toyo pistil grip cutter, nothing too exciting here.
| Grind Time!
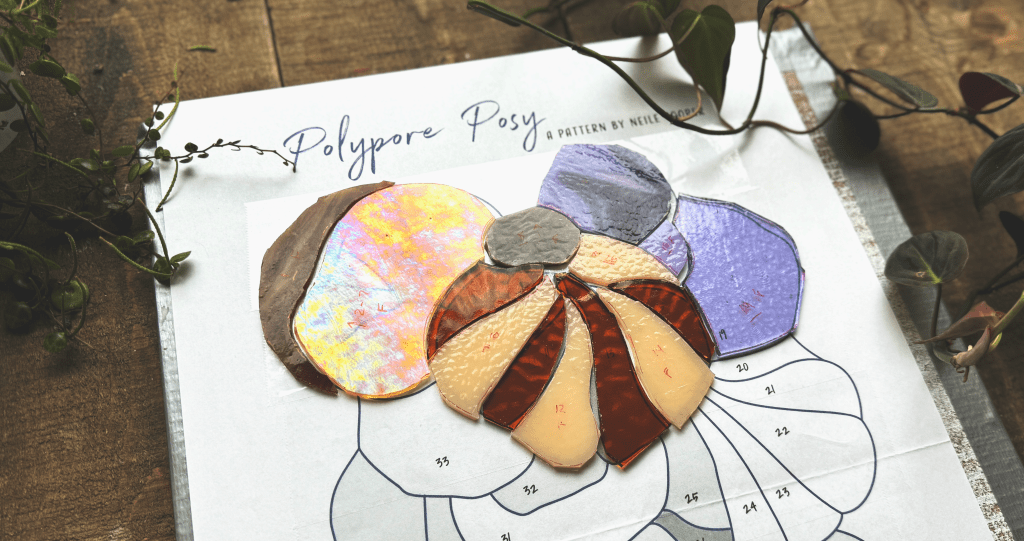
After cutting out the first three small clusters, it was time for the grinder! I’m really happy with my glass choices so far and wanted that center cluster to have a pretty good contrast so I opted for a deep amber and an opal cream. The top right cluster is a purple bundle of Bullseye neo-lavender opal, streaky neo-lavender and transparent neo-lavender. Purple isn’t even my favorite color (it’s green) but I love this hue of lavender so much. I had a 1″ x 2″ piece left over of the neo-lavender opal in my scrap bin and I’m so glad I was able to find a small spot for it in the top right cluster.
When I’m not using Cricut to cut my pattern out, it takes me a lot longer to grind and fit the pieces since I don’t have a stable vinyl line to grind up to. Instead, I grind the piece to match my original drawn line first to get off the sharp bits and then clean it off, check it against the template and mark where I need to grind more… grind a little more, check against template again, mark new spots, repeat… it takes longer but for some reason I really enjoy this process. It’s a different kind of flow than my market prep, there’s no deadline looming over my head so I can really take my time and fall into the process.
| Top Section, Done
I finished grinding the top three clusters and now I’m ready to pull glass for the next few clusters this coming week! I have some ideas where I want to take the palette next but we shall see.
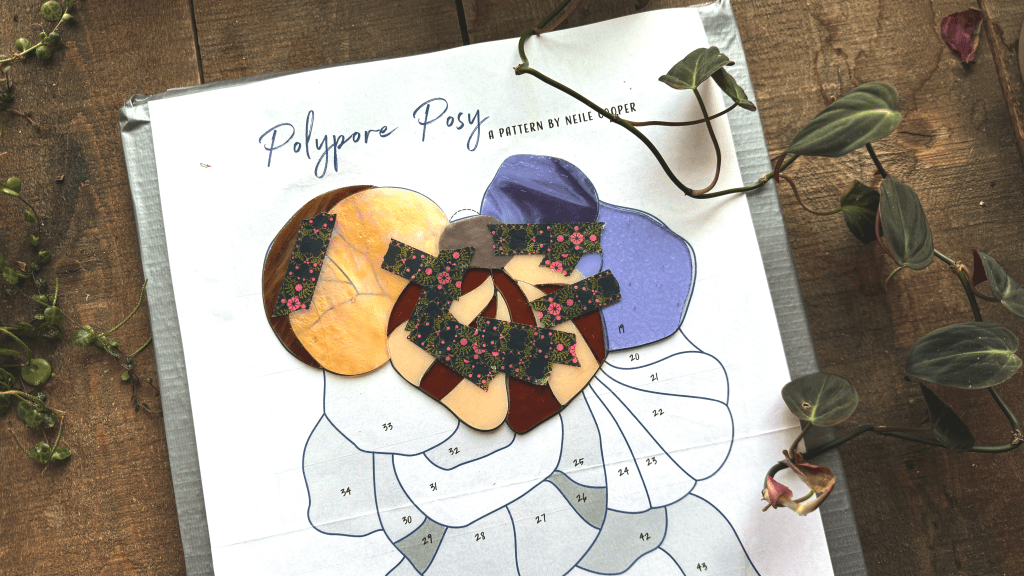
The top section took me about 3 hours to cut and grind. I’ll be keeping better track for the sake of documenting and I’ll try to do that for the rest of the project! Oh, and for the top tan piece on the left I decided that I want to include some added detail with wire overlay so I opted to cut that piece whole rather than piece it out into 6 pieces.

